When you need to store data in a reliable way but you don’t need to read them often, this is named a “cold storage” need. This is typically what I needed for my Synology NAS where I wanted to backup data to an external site (but I don’t intend to actually use the backup since the NAS is already my first level of backup and I only want to protect myself against a major catastrophe, like a fire or water hazard around my NAS, with the potential to lose both the computer(s) and the NAS server).
I had explored several on-line options like:
- Amazon Cloud Drive, which is now quite expensive when you send it several tera-bytes.
- OVH Cloud Archive, that I failed to configure (even with the help of the OVH excellent support team); I had to look at OVH Cloud which is actually priced very similarly to ACD (the price structure is a bit complex, though probably a bit cheaper in the long run).
- Hubic, which decided to close its doors to new customers.
So, the only solution left was elsewhere: Archiving to an external USB hard drive, but alternating between two physical disks to allow always keeping one off-site (far from fire and flood).
The configuration is not very complicated but requires a bit of attention and of patience.
Pre-requisites on Synology DSM
The main advantage of Synology is their comprehensive interface very consistent from one NAS model to another (DSM). So, this will essentially apply to all Synology configurations, large or small.
 The general idea is to backup one directory from the Synology server to the USB3 external drive. You need the “Hyper Backup” package installed. It is perfectly apt to backups toward a variety of options (I previously used it with Amazon Drive (now too expensive to my taste) and with the now-dead hubiC).
A simple recommendation: Don’t apply versionning on the NAS itself (it tends to eat a ton of space up and appears difficult/impossible reconfigure later on). On the other hand, you can ask that from Hyper Backup which does it perfectly well. Eat space on low cost external storage rather than on high-cost primary storage.
Configuration
Format the hard disk drive(s)
I have chosen 8 tera-byte disks from Seagate. At first, I was looking at the unusual (but cheap) Seagate Archive 8TB. but they have now been replaced with Seagate Barracuda 8TB 5400rpm (which have about the same read speed but a much better write speed, for a similar cost).
Let’s start with connecting the hard drive (in its USB3 enclosure which has been selected as UASP-capable for best performance) to the Synology. It will be immediately recognized and mounted by DSM as USB Disk 1 (or USB Disk 2, depending on the USB port you used). It is highly recommended to format it with a single EXT4 partition.
In the DSM Configuration Panel, under the “External Devices” category, you will select the USB Disk 1 and click on the “Format” button. then, chose the default options.
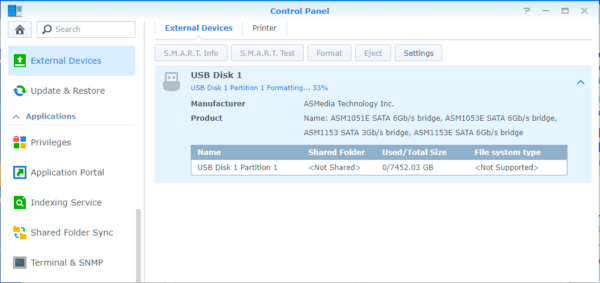
Progress will be slow (half an hour is usual) but with no special issue to expect.
Name the hard disk drive
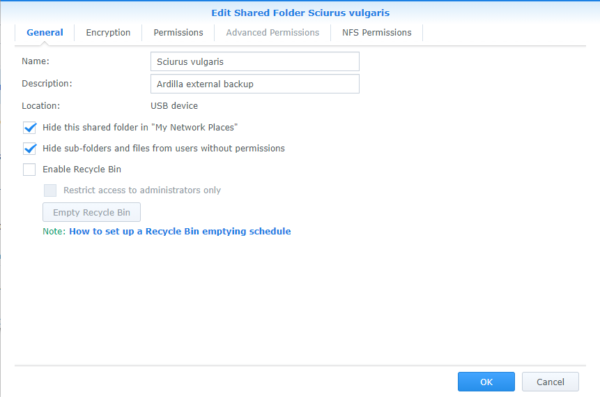
This is not very critical, but much more comfortable to name the disk (Data1 and Data2, if you want; For me, it will be Sciurus vulgaris 1 and 2).
Just after formatting, in the DSM Configuration Panel, under “Shared Folder”, select the usb_share_1 directory (the number may vary), then click on the “Edit” button to access a few options including disk naming.
I recommend (your choice) some options:
- Hide the directory in “Network locations” and “Hide sub-directories” to limit the attack surface of a potential intruder.
- Encryption: It may come later.
- Access control: Limit it to the only user which is running Hyper Backup (Nobody else is supposed to directly access your archive).
Configuration of Synology HyperBackup
As I decided to use HyperBackup, everything will be quite simple from this point. In HyperBackup, click on +, then “Data backup task”.
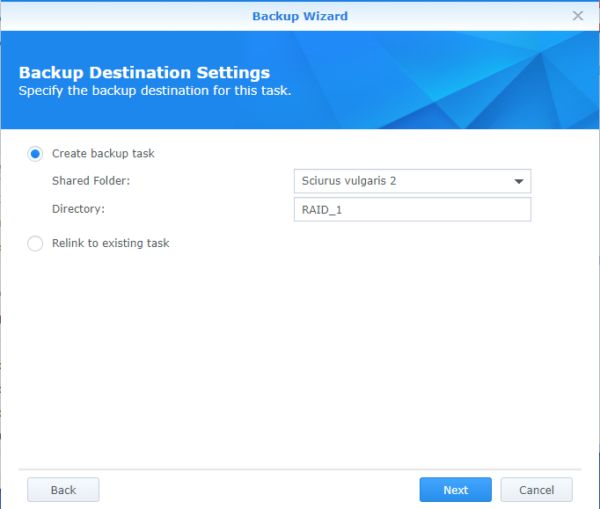
You will need to designate a backup on an external drive with “Local folder & USB” in the dialog window shown here.
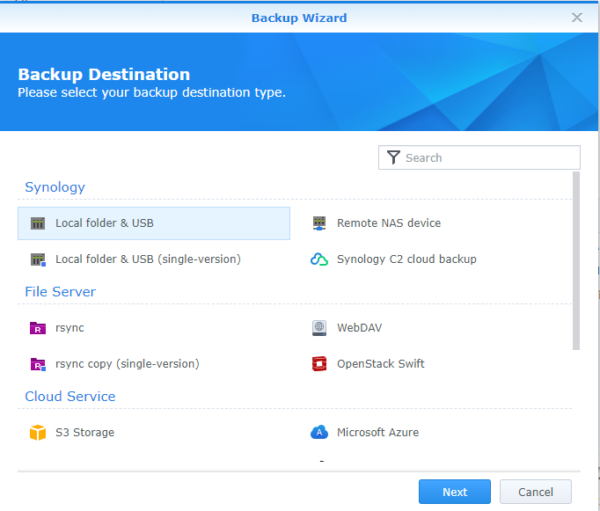
You will then need to describe your backup(s) from several dialogs that are more or less explicit. First, you must point to the destination (the external USB disk):
Then, you will be invited to point to the directory (possibly several of them) that will be backed up. Then, HyperBackup may offer to backup the parameters from some of the applications you installed on your Synology NAS (I chose not to do this, but it’s really your choice), before arriving to the main settings dialog:

The most critical is certainly client-side encryption (at the bottom of the dialog) which will allow password-protecting the backup data set. As we are intending to leave the external USB disks on a distant shelf, I strongly recommend to protect it against prying eyes. But, be sure not to forget the password, of course…
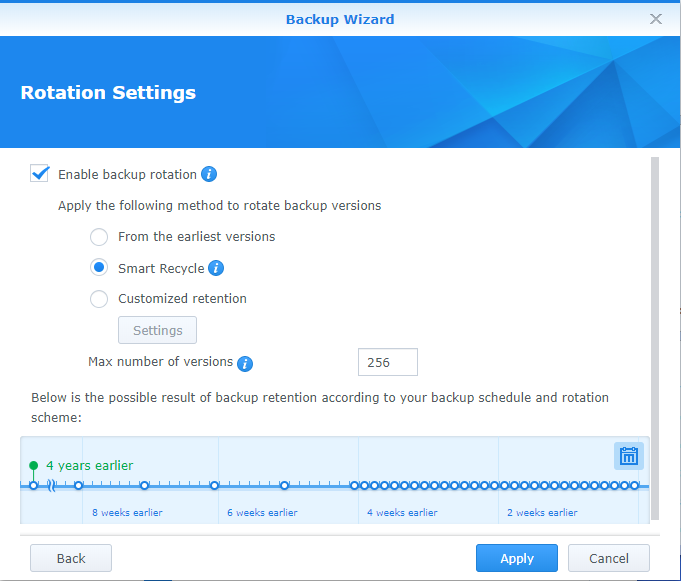
Then, you will have the opportunity to set the versioning parameters (to be able to travel back in time in your backups to recover one of the successive version backups of a given file). I chose the SmartRecycle parameter with 64 versions (nine months of protection if I apply a daily backup). But you may want to experiment a little in order to make your own decision.

Don’t forger to do this twice: One task per hard disk drive will allow HyperBackup to keep backing up when disks move out or come back from cold storage, depending on which is stored away (each month, maybe).
Finally…
Never forget that a backup only works if you can use its restore feature. It is best to spend a few hours every 6 months to restore a few files and check that everything is still working.
Of course, the best is to test the whole installation in the first hours after setting it up (at least, if you want to write down the restore procedure; You may need it some time in the future…)
Leave a Reply