I have always be willing to test-run RAID technology for the storage of the files on my personal LAN. This technology has the advantage of being far more secure than the usual hard disc storage. By using more than one disc drive, RAID allows to gain additional security. In short, if a disc drive fails (it happens!), the RAID array (that’s its name) will keep working with no data loss [more about it on the wikipedia encyclopedia].
However, using such a technology was not for everybody up to now. You had to be a computer guy to know about it, you had to be a real computer guru to use it. It all changed with two things:
- Some RAID appliances start appearing on the market. You buy them and you get it.
- GNU/Linux now includes the needed tools to allow building of a RAID array if you are willing to connect enough drives to your GNU/Linux box.
I wanted to test the later. So here is a summary of my experiences with RAID technologies just using a couple of hard drives (two drives in RAID-1 redundant mode) and OpenSUSE 10 that I had recently installed on this machine.
My intent was -more precisely- to check the behaviour of the RAID array under the following circumstances:
- What happens if you don’t have identical hard drives to start with (this is common if you do not buy them at the same time).
- What happens when a hard drive fails (it is supposed to protect me against it, but I prefer to test rather than believe the hype).
- What happens when we plug a new drive to replace the failed one. And I will suppose that once again it’s a different drive (after a few years of operation and a failure, there is no reasonable chance of finding an identical drive).
And, of course, I wanted to understand if this RAID array could be handled by some reasonably understanding guy, not a guru-like computer hacker (I knew that some of the tools were available with command line interface but, while it would not necessarily frighten me, it would become a real problem for most users).
Plug the drives
The very first step was to install the discs in the machine. Here there was no real difficulty. I plugged the two additional drives in the PC, connected the ATA-IDE cables, conencted the power cables and booted the machine again.
Formatting time
Of course, after plugging, comes the time for partitionning and formatting the drives. Since this is a rather odd combination that we are building I was expecting the worse. But it was not the case at all.
The first thing was to go to the YAST configuration tool of OpenSUSE (easily found in the system menu). When starting YAST, you need to enter the root user password, but you are supposed to be the adminstrator of your Linux box if you’re attempting this, aren’t you? In the system menu, I selected the partiton making tool.
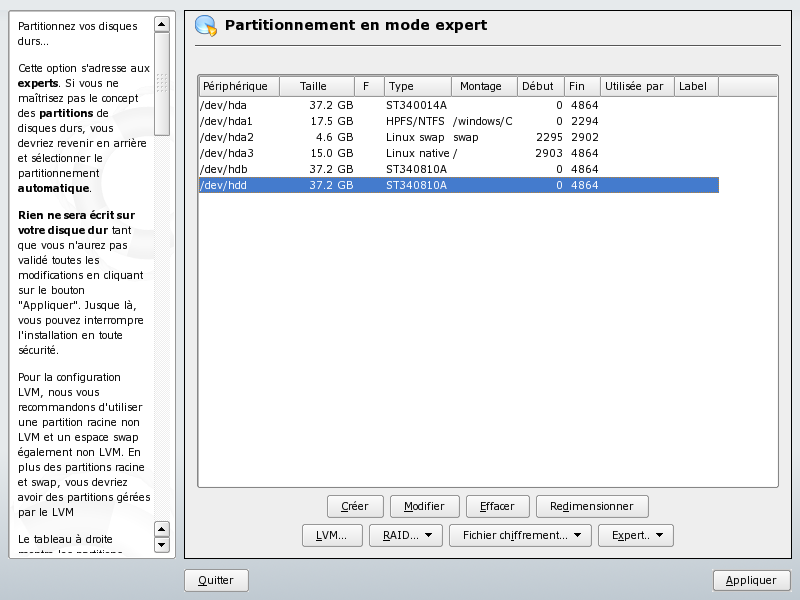
The list was already showing the “normal hard disc drives” of my configuration (/dev/hda in the present case) and presented two unformatted discs (/dev/hdb and /dev/hdd at the bottom of the list).
There, I could request the creation of the two primary partitions for the two hard disc I had added, using the Create…/Créer… button at the bottom of the screen. The only thing to do is to avoid the default proposed options and go for unformatted partitions, selecting the OxFD Linux RAID partitions (thus, the purpose is quite clear). One note here, since I wanted to test different disc sizes, I chose to partition only a small part of the /dev/hdb disc (2048 cylinders only for about 20GB).
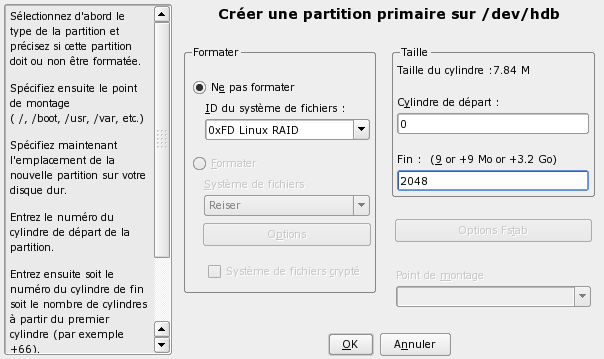
Then, I repeated the same with the second disc drive, but using a slightly larger partition size (3092 cylinders only for about 30GB). Leading to the following configuration:
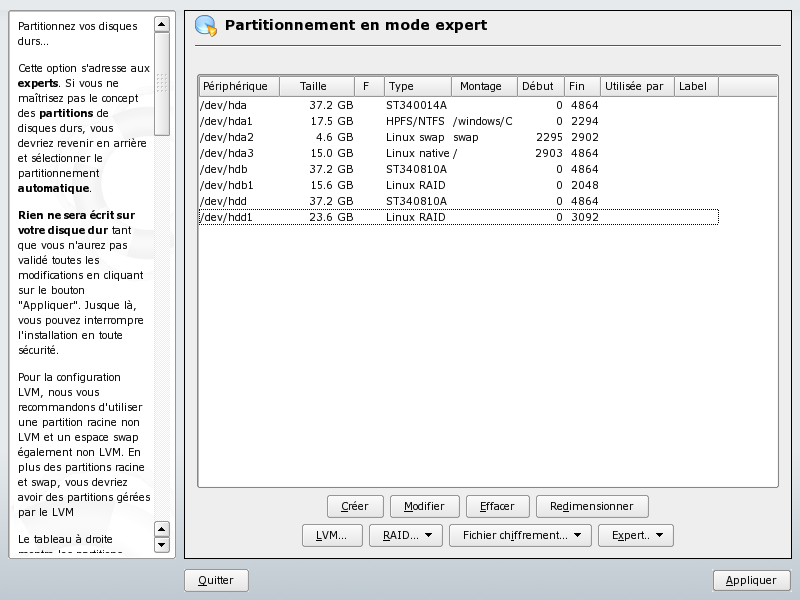
RAID creation
The creation of the RAID array from the two disc drive partitions was even easier. After pressing the RAID/Create RAID… (RAID/Créer RAID…) button, I was presented the following screen:
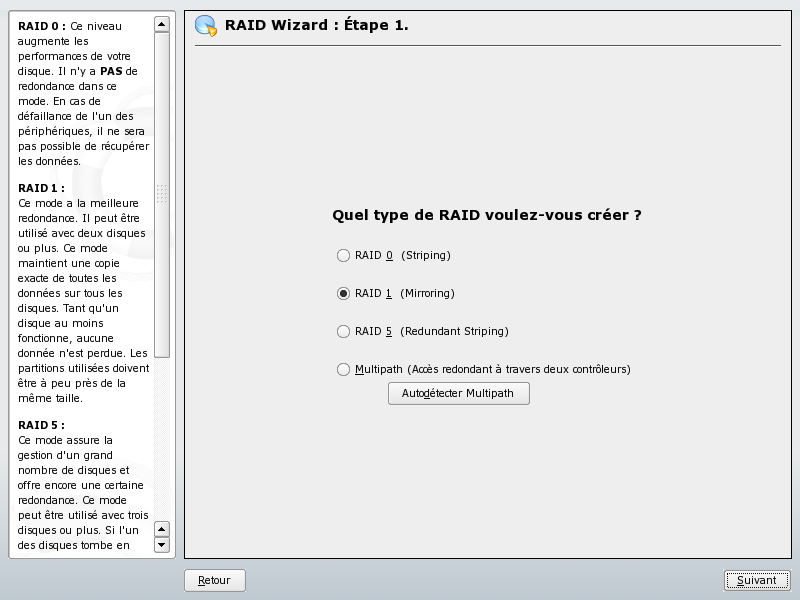
Choosing the RAID type can be a little difficult, so I suggest that you read the Wikipedia article about RAID. But in the simplest case -mine- it was just a matter of choosing RAID-1 (Two drives operating concurrently to provide a secure storage of the size of the smallest of both drives).
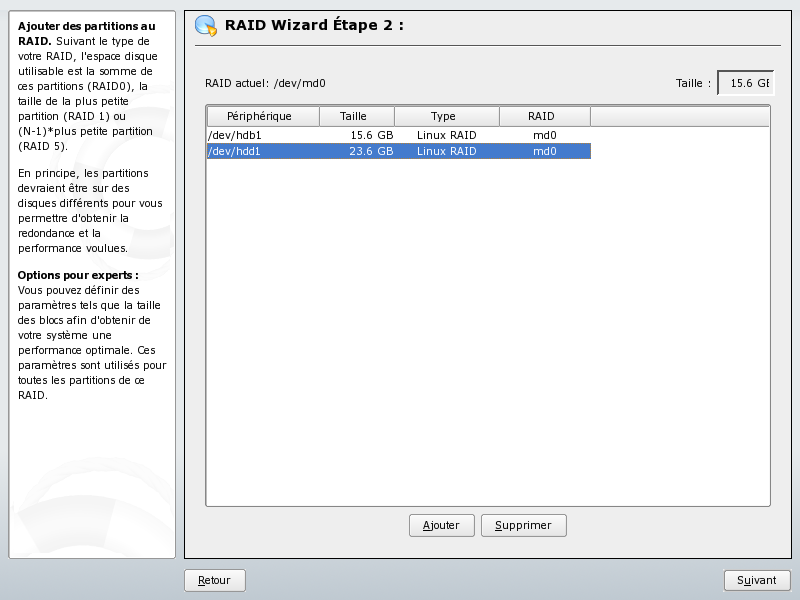
Then, we are presented a screen with the list of the RAID-prepared partitions (the two ones that we made previously from /dev/hdb and /dev/hdd). It’s just a matter of calling them in with the Add button at the bottom. When both drive partitions have been added to the RAID array, the screen looks like the following:
Formatting the RAID array
The RAID array being created, it’s now only a matter of formatting it (pressing the Next/Suivant button at the lower right part of the screen). You are led to the following usual YAST screen:
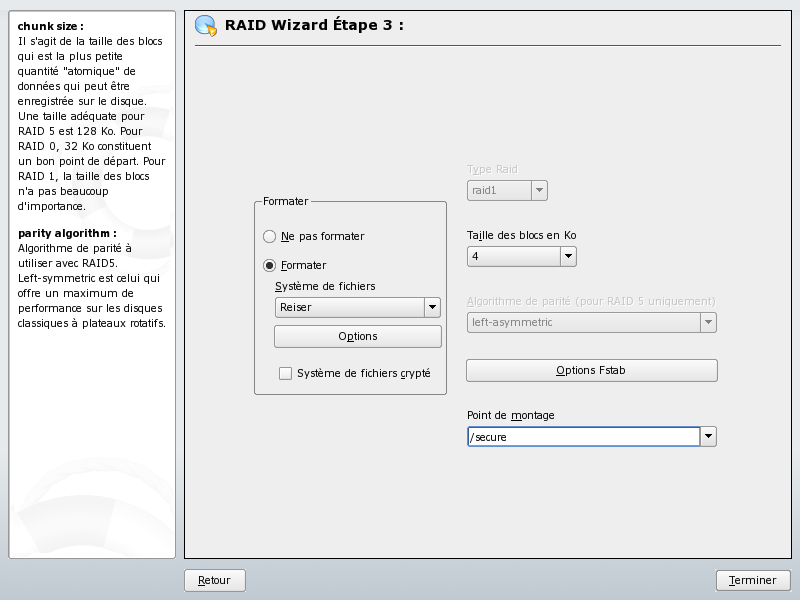
There, I decided to accept all default options, including the choice of the Reiser file system. But I have entered the mounting point (Point de montage) as /secure (it seems to be a completely free choice to be made by the user, so I just wanted to emphasize the added security this would bring to my LAN by choosing a shiny new directory name).
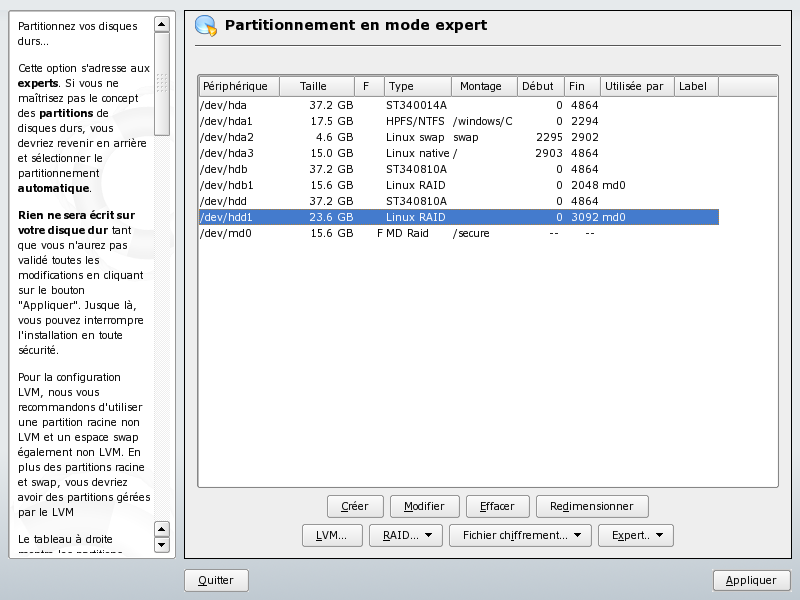
Then, go and press the Finish/Terminer button at the lower right corner of the screen. You are then led to the following screen that summarizes the action and shows the result of the RAID creation with the /dev/md0 RAID drive showing at the bottom of the drive list.
It is important to understand that one advantage of the YAST tool is that nothing has really been done to the hard drives up to now. All commands have been prepared, but it’s only when you will press the Apply/Appliquer button at lower right corner of the screen that important actions will be taken.
If -or when- you do so, you will be presented with a confirmation screen very similar to the following:

If you are ready to apply then, it’s just a matter of pressing the Apply/Appliquer button at lower right corner of the window. This confirmation will start the operation of creating the RAID array in the background.
It may take some time, but you will notice that things are going quite smoothly since you can immediately go on the next steps.
Sharing the RAID array
Since I wanted to create a Networked Attached Storage (NAS) drive, I needed to make it available through the SAMBA/SMB server. This is a quite common step for file servers, but it is not needed if you only need to operate with a single Linux machine.
Here you need to go to a different part of the YAST configuration tool: Network services and SMB server. Requesting a new share, leads to the following screen:
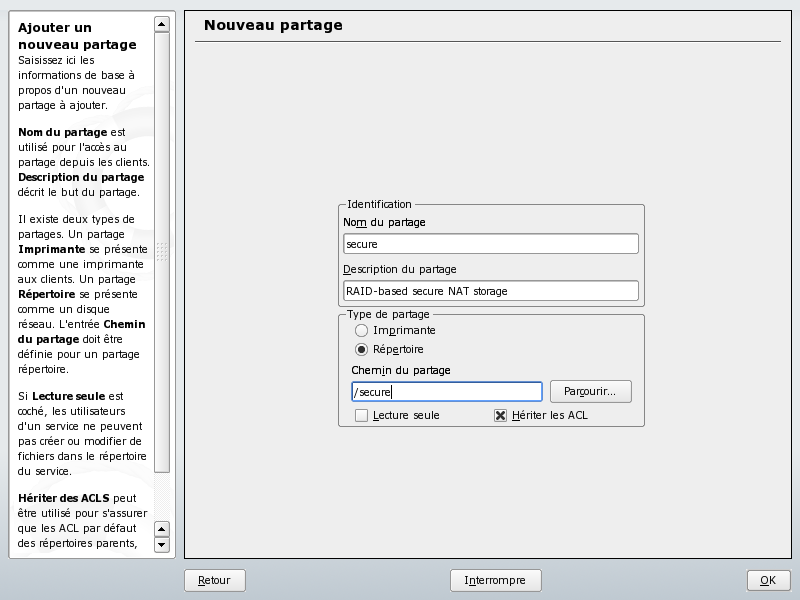
It contains the information I started to fill: The share name (“secure” to be homogeneous with the rest), a free description text, and the path of the shared directory (“/secure”). Pressing the OK button leads to the new list of shares showing the just created “secure” share:
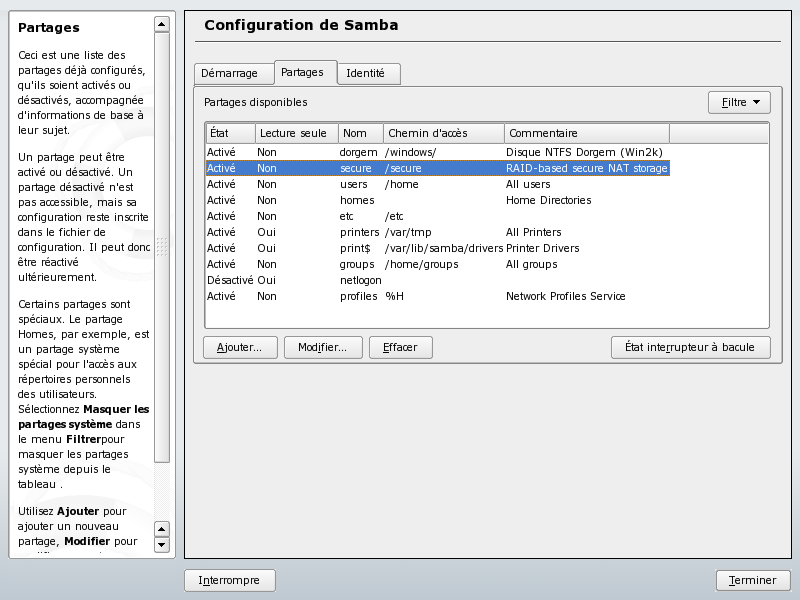
You can press the Finish/Terminer button as a last operation. Your RAID array is network visible.
Other small things
Depending on your actual settings, you may have to give access rights to users. In my case (I am working on a secured/closed LAN where I am the only user), I chose to open it to everybody with the chmod +777 command (see below).
leakey:/secure # chmod +777 /secure

leakey:/secure #
After that, there is only one thing to do: Wait for the end of the RAID array preparation (remember that I said it is done in the background). You can’t see it except that during the RAID-building operations, you can notice the red light of the disc continuously lit until the end of this operation.
If you want to have a more precise information, you can use a line command like the following:
leakey:/secure # cat /proc/mdstat

Personalities : [raid1]

md0 : active raid1 hdd1[1] hdb1[0]

16458496 blocks [2/2] [UU]

[========>............]  resync = 43.8% (7218432/16458496) finish=6.7min speed=22799K/sec
unused devices:
The above shows the array being built (43.8% progress). Below you can find what is presented if the array has been fully built.
leakey:/secure # cat /proc/mdstat

Personalities : [raid1]

md0 : active raid1 hdd1[1] hdb1[0]

16458496 blocks [2/2] [UU]
unused devices:
leakey:/secure #
But, if you don’t want to be bothered with this, just wait and look at the red disc light. When it goes back to normal (when it is no longer continuously lit in red), the operation is finished and you can use the RAID array.
Leave a Reply